But for today, I have a DIY repurposing post for you. It starts with two solid wood closet doors that I found at a salvage store:
Ooh, look at that molding! (Confession: I always want to write "moulding," does that mean I've read too many British novels??).
 I bought these doors really inexpensively, not really knowing what to do with them. Finally, after talking it over with Joe, we decided that making a sofa table would be a good idea. They're nice and narrow, so it gives the right dimension for the tabletop depth.
We started by cutting down one of the doors to make the top, and cutting the other door down for two legs. I also bough one 1"x6" board 8ft long to cut into a bottom brace and two aprons (those boards that go under a tabletop to support it).
Then we (well, Joe) cut a 45 degree angle on each end of the tabletop, and then attached another piece, cut at 45 degrees, to make the moulding look like it wraps around the ends--the raw ends without this were ucky. Yes, ucky.
Next. I patched up the cracks and holes on the top, making it as smooth as possible.
Exhibit A: Bottom Brace. Pocket-screwed into place (that means the screws were put in at an angle). Then, we filled the holes left by the screws so they would be invisible!
I feel bad for anyone who tries to take this apart in the future--we pretty much covered up all the screw tops so they're nearly impossible to find. Whoops!
And here are the aprons. See those little ends? Those are called tenons--basically the wood is cut down to form those little guys, and then a little hole the same size is made on the piece it will be attached to. Then, slide the tenon into the mortise with some glue, and it forms an incredibly strong joint.

Wham, Bam! The aprons are installed and that makes the frame very sturdy.
Then, we just screwed the top on, and filled the holes (see what I mean about not being able to tear it apart...?)
And this is when this conversation happened:
Me: What color should I paint it??
Joe thinking: ...why does she ask me these questions...?
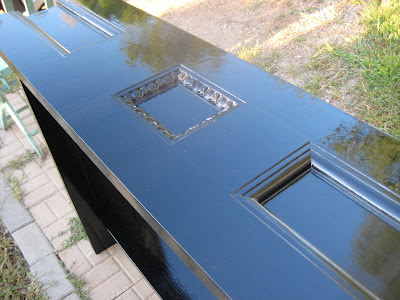
Me: I think it would be really sexy in an oil-based gloss black.
Wow. Great conversation.
And that was that. So I painted it with oil-based black, and I was right. See? Sexy.
And now it's in the store, waiting for someone to take it home (and maybe they'll be really nice to it and get a piece of glass for the top!)
Coming up: A couple of simple projects that can be done with a little spare time and common tools!


No comments:
Post a Comment
I love to read your comments and questions!