
I was going to post this baby last night, but then I got all responsible and stuff and did all the dishes. Normally I do them every day and it only takes about 15-20 minutes. Well, I had procrastinated for a few days, and it took an Hour and 15 minutes. Yikes. But that's done now, and I get to do fun things like:
1. Hope that it rains today so my rhubarb & chives can grow. UPDATE: I JUST HEARD SOME SPRINKLES!!
2. Watch my tomato seedlings grow (they're almost all up!)
3. Work on an upholstered biscuit box--you'll see that another time
4. Show you a great table and chair set!!
That about sums it up. And since I've done the first two a little today already, it looks like it's time to skip to #4! I got this table and chair set off of Craigslist, and boy was I excited to get my paws on it.

You'll have to imagine what the table looked like when it was assembled, because I got it while it was disassembled and I surely wasn't going to try to get all those legs on just for a "before" picture.
Heck no, Techno.
And here's the "After"!

Here are my supplies. Well, most of them. This baby turned into a bit of a problem child, so I added in some other products as I went along. Get ready for an epic tale.

Here is the finalized list of what I used, sort of in order. Don't let the length scare you, I just happened to have most of these on hand. You could easily get a very similar end product without going through all these steps.
1. Solvent Resistent Gloves
2. Respirator. NOT JUST A FLIMSY DISPOSABLE PARTICULATE RESPIRATOR! Those pieces of junk do not work for fumes. If you can smell the fumes, your respirator is not filtering them out and they are headed to your lungs and bloodstream. You can label me as the crazy respirator lady if you want, but that chemical crap is not to be fooled with, which is why oil-based products usually have a warning on the side that say scary things about diseases and cancer. That's why most of the time I use water-based products.
3. Paint Brush
4. Lots o' paper towels
5. Paint Deglosser. I used Zinsser's formula and it worked pretty darn well.
6. Floetrol. This basically keeps your paint "wet" longer, and reduces brush marks. I'm getting to the bottom of my paint buckets, so the paint is very thick. I was glad to have this puppy around to thin it out and make it much easier to work with. I don't believe I have ever introduced you to this charmer. Sometimes I forget I have it. oopsy. Well, here is your formal introduction. And yes, it does have an oil-based brother, Penetrol:

7. Primer. I use Zinsser FastPrime2. It has great adhesion, ooh, I love that in a primer.
8. Black paint to tint the primer
9. Creamy white latex paint
10. Orbital Sander & medium grit sanding pads
11. Medium-Dark oil-based wood stain (you could also use water-based, I just had oil-based on hand). I used a mix of "Traditional Cherry" and "Golden Pecan" by Minwax.
12. Watered-down creamy white latex paint.
13. Water-based Polyurethane. I am faithful to Minwax Polycrylic.
14. For the chairs: Spray Paint!
PHEW! I think that's everything. Here we go to the fun part...Pictures!
First, I put on my respirator and gloves, then used the deglosser. I decided on deglosser because the surfaces of the wood were very slick and a little sticky. I would have just sanded, but there were so many round spindles on this piece that I needed another solution. Deglosser essentially makes the current finish soft, so the primer can bond to it easily. I hadn't used it before, but I was very pleasantly surprised. Also, I used it to get off some old sticker residue yesterday, and it was an instant success.
First, I scrubbed down the whole piece with paper towels soaked in this vile smelling deglosser. I scrubbed off all the dirt and leftover yuckies (there were definitely kiddos eating at this table). Once it was scrubbed clean, I used a paint brush to brush on an even coat of deglosser. Let it sit for 30 minutes--it evaporated, and painted it with primer within the next 30 minutes.


After the white dried, I sanded away with my orbital, and a little hand-sanding as well.

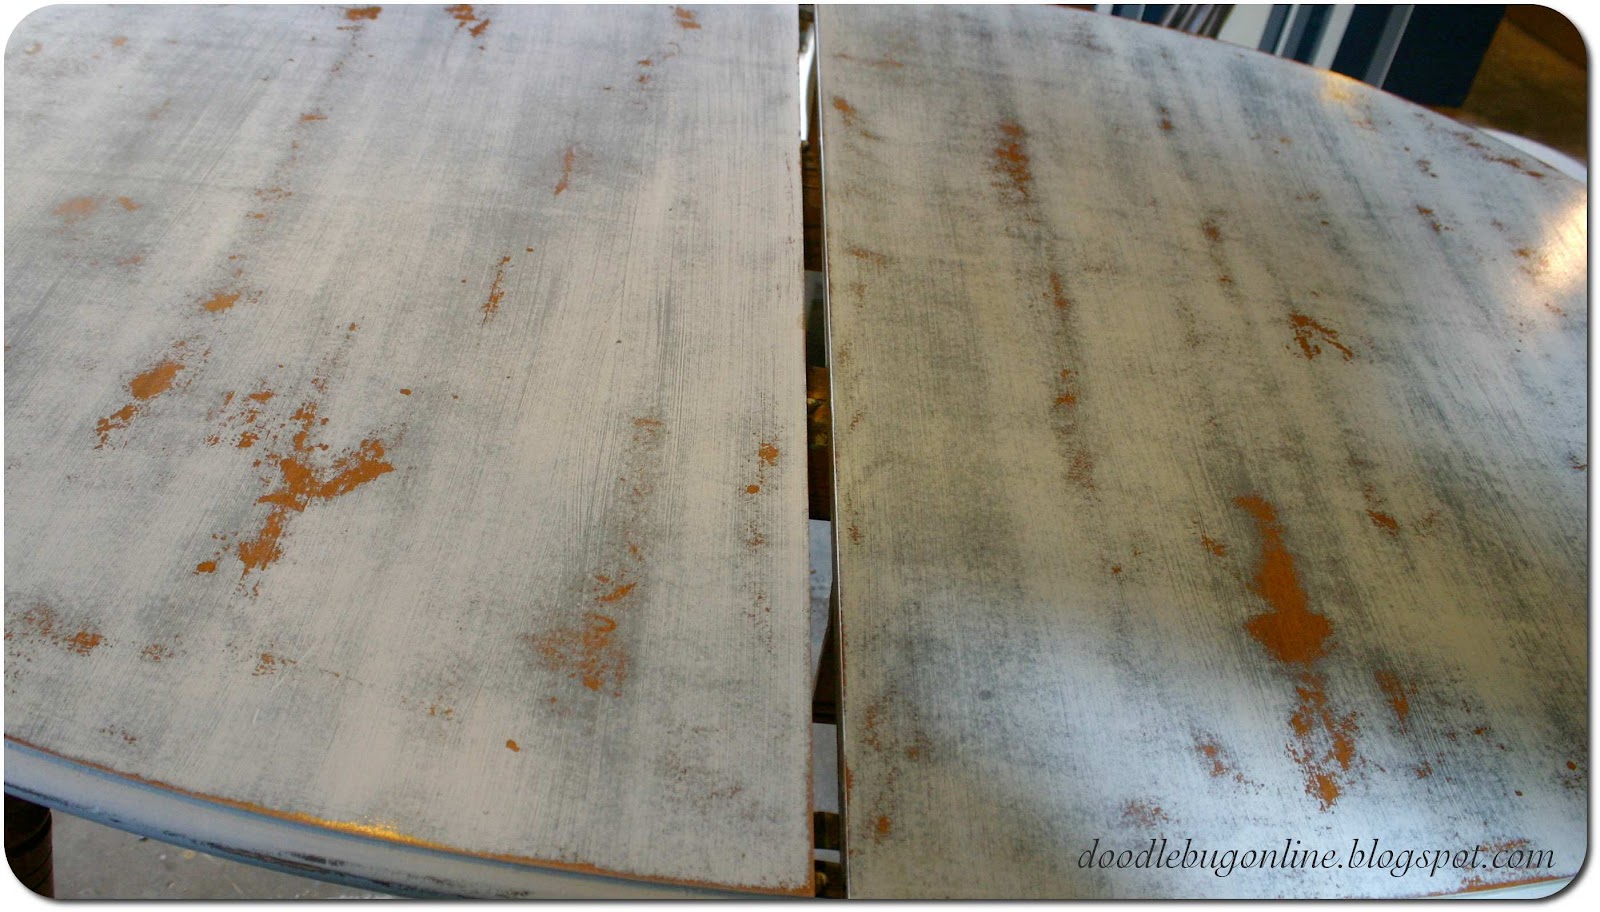
And here's where things got...complicated. Once I had it sanded, it seemed too "flat" and it needed some warmth. So I thought "Hey! I'll just throw some stain on it!" Here is the right side with some stain, left side without.


Here she is after some Poly and a day to dry!


Have a great day!
~The Doodle Bug
I'm Usually found linking up to these parties:

Hi Becky,
ReplyDeleteI just love your table transformation! So Shabby Chic and gorgeous. Yes, I'm gasping :-)
Very nice work! it looks great! Little Bit looking for a way to follow you...facebook?
ReplyDeleteWonderful transformation...funny how making something look older gives it new life!
ReplyDeleteJermaine
Little Bit-thanks for stopping by! You can follow me via Facebook, Twitter, or Email, those buttons found on the top left of the page. They'll take you to the page and you can follow from there! Or if you follow via Blogger blogroll, you can manually enter the address. I heard a rumor that Google is going to switch things up with how to follow, so I'm feeling a little paralyzed :)
ReplyDeleteHey it looks great and really filled your space in the shop well. Great Job!
ReplyDeleteWow, great job!! It looks so pretty in the distressed grey! I'm glad to have found your blog. Your comment on my guest post made me laugh- my husband told me pretty much the same thing only he left out the "definitely awesome"...LOL.
ReplyDeleteIt looks amazing!! I love it so much!! You are so good at this all!!!!
ReplyDelete~rach
Lovely!
ReplyDelete... the table and chairs look amazing. Great job!
Visiting from Feathered Nest Friday :)
Greetings from Australia♥
~Pernilla
Nice transformation,It looks that you buy new set of dining table.This really a great project.Thanks for sharing ideas.
ReplyDeleteThis comment has been removed by a blog administrator.
ReplyDeleteThat table and chair is amazing! I really want to make one
ReplyDeletekitchen Table And Chairs For Sale
Furniture Stores In Denver Colorado
That's a great position you folks have been carrying out there.
ReplyDeletelaminator