


But we're back to our normal routine now, and a friend and I finally got a project done together that we've been planning on for months. I'll call this friend "L" (I wouldn't want any creepers reading my blog and figuring out her real identity. I know you're out there, creepers). Just kidding...mostly.
Anyway, last Saturday L's kids were off to their Grandparents and she and I got the chance to tackle this little rocking chair that she had found. She bought this little chair for her daughter, and had also picked out a great fabric to reupholster it. There's nothing wrong with the chair as-is, it just seemed...tired. It needed a little excitement, so I headed over there with my staple gun and we got this baby done in a fun-filled half a day!


Here's how we did it.
Reupholstering a Kiddie Rocker
(the chair kind of rocker...not an emo kid...)
Supply List:
Stapler w/ Staples
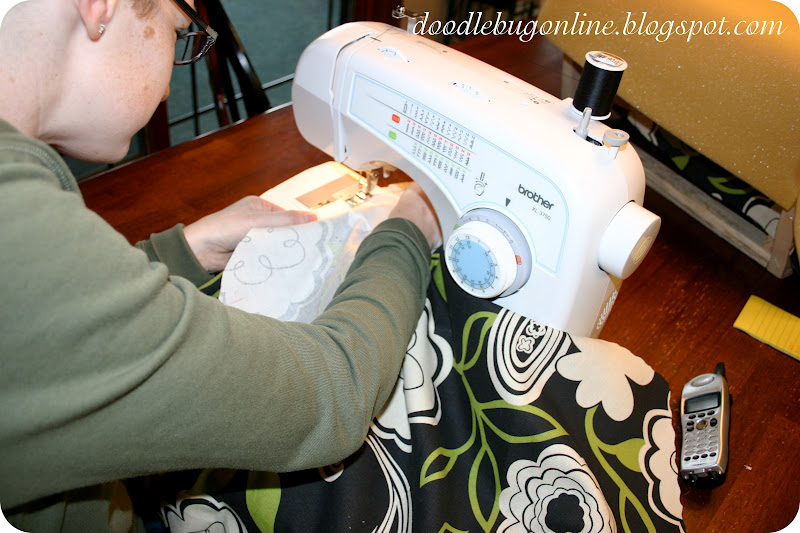
Sewing Machine w/ Thread
Upholstery Fabric (about 2 yards)
Prying tools like a baby crowbar, flat screwdriver, Needle-Nose Pliers, etc...
We also used a hammer a few times when the staples didn't drive far enough in, as well as a phillips head screwdriver to remove & attach the bottom runners.
To start, L unscrewed the runners from the bottom of the chair.

Before you begin: Take off manufacturer's tag that threatens you with prison, starvation & possibly death if you remove it. Come and get me, Tag Police!!

Step 1: Take out staples...and keep taking them out...forever...or until the tag police show up and ship you off to Tag-Removal Prison. It's just west of Urinetown (gold star to anyone who understands that reference). ...and Remove Fabric: Keep each piece of fabric, as they will be the pattern for you to cut the new pieces.

We used L's husband's tools for this one...well, I think some of them are hers. Like this little crowbar that I loved!

The back panel on the chair was attached with these tack strips. We carefully removed them, so we could reuse them. Because we're cheap resourceful. And we're in Dave Ramsey's class together, so we had to.

And the top section just had a strip of cardboard stapled as a tack strip--because the top was a curve. We just ripped that part out, and used another cardboard strip to replace it.


Now it was time for the fun stuff, the actual reupholstering!
I wrote down each piece of fabric in order as we took them off, so we could just put them back on in reverse order. L labeled the pieces so we would know where each piece went. We were Soooo much more organized that I would have thought to be on my own :) (She's a mom and stuff, you know how it is). Next we laid out each old piece of fabric onto the new fabric and cut out the new pieces. We marked on the back where the sewing needed to be, and were very meticulous note-takers.
Step 2: Seat Fabric. The first piece to go back on was the seat. This was a simple tuck, pull, staple deal. Just pay close attention when removing the fabric and see how it was attached (make notes or take pictures if you need), then reattach it the same way. When upholstering, make sure your fabric is nice and snug against the foam. Not too tight, or you'll get unevenness, but tight enough the fabric feels snug.

This piece had a little sewing on the arms and a couple other darts. Again, we had the pieces marked from where we ripped out the original seams and we just copied the old pieces.

Step 4: Back Cushion. Again, this is just a simple tuck, smooth, staple.

Step 5: Attach the Back Panel. This was a new one for me. I've seen the tack strips, but never attempted them myself. They are used a lot on couches--your couch likely has them attaching the back panel, so if you ever need to get them off and on, here's how!
First we did the top curved section. This picture is actually wrong. See how the cardboard curves, but I didn't curve the fabric to match? Yeah, that didn't work. So we took it back off and then redid it with the fabric curving with the cardboard. It worked like a charm.

Using Tack Strips
Step 1: Lay your tack strip down about 1/2" away from the edge where you want it to end up, tack side up.


Okay, back to the regular tutorial.
Step 6: Reattach the Dust Cloth (black fabric on the bottom) with staples.

Sweet Victory!


I have one more thing to share with you. I neglected to mention that L's husband is an engineer. So when they wanted to put in a sandbox for the kids, did they go get one of those green plastic turtles? Of course not! Why would you get a green plastic turtle when you can design, draft in CAD, build, and install your own custom-made covered sandbox with benches???? And of course they filled it with awesome white sand. Only the best for my friends' kids :)

So that's what I did last weekend, and it was awesome. My parents are up to visit this weekend, so it's going to be another weekend full of fun--what more can a girl ask for?
Well, except maybe to play in that sandbox. And steal a little baby crowbar...

~ The Doodle Bug

I'm linking up to:
P.S. I had someone ask what a "link party" was, so if you don't know it's basically a party a blogger hosts which you can link up to. I share my link on these bloggers' posts, and then I get to see everyone else's great ideas, too. So if you're in a blog-surfing mood, just check out any of the links below and see what people have been up to!


That turned out awesome! And I love the sandbox too!!!! Way to go girls!
ReplyDeleteLOVE IT!!!! It is adorable!! Nice work!
ReplyDelete~rach
I am speechless!!! This is the coolest job EVER! I'll be sure to "bookmark" it. Just for fun, I posted about a piece of furniture today, too! : )
ReplyDeleteM.L.
You make it look soooo easy! It turned out so nice! I used this fabric too on a chair....but I'm only brave enough to cover a seat:-)
ReplyDeleteWOW! This chair is gorgeous! What a great tutorial and that fabric is amazing!
ReplyDeleteYou make it look so easy! Beautiful transformation! Great tutorial!
ReplyDeleteHello! Keep it up! This is a good read. You have such an interesting and informative page. I will be looking forward to visit your page again and for your other posts as well. Thank you for sharing your thoughts about upholstery. I am glad to stop by your site and know more about upholstery.
ReplyDeleteAn automotive upholsterer, also known as a trimmer, coachtrimmer or motor trimmer, shares many of the skills required in upholstery, in addition to being able to work with carpet.
Since opening in 1938, we have become one of the largest upholstery shops on the North Shore. We believe furniture should be built to last and passed down through generations.
upholstery kittery point ME
i am trying to folow your tutorial. i am totally new at this diy concept....i cant figure out how to staple the material so that the staple holds. what am i supposed to do?
ReplyDeleteShe bought this little chair for her daughter, and had also picked out a great fabric to ... ebabychair.blogspot.com
ReplyDeletewow!! Hire wooden chair
ReplyDeleteevent chair
chiavari chair
led bar
vintage chair
I am thankful for this blog to gave me much knowledge regarding my area of work. I also want to make some addition on this platform which must be in knowledge of people who really in need. Thanks. wooden name train
ReplyDelete