
I went to my favorite little thrift store and found a white dresser for $10. It's not of the highest quality, (drawers are sticky and hard to move in and out) but for $10, it means that if I don't want to move it somewhere in the end, I can just re-donate it. My theme throughout this whole project was, "Hey, $10 Dresser." It was the perfect reasoning to do a few crazy things.
Here is the dresser as I brought it home: It had been repainted by someone, probably in the 60's-70's, since they went for a white and gold theme.


And now the fun starts! I had found a roll of textured paintable wallpaper at the Habitat for Humanity Re-Store, along with a bucket of wallpaper paste, both for just $4. And the front of the bottom four drawers got a smack of some texture!

Hooray! And next, the water-based gloss black paint. I had gone back and forth on what to paint the dresser, but my dream bedroom would be a dramatic black, white and grey room with chandeliers (yes, chandeliers in the bedroom). So I decided that even though my current bedroom walls are sage green, I didn't care. Gloss black, here we come.
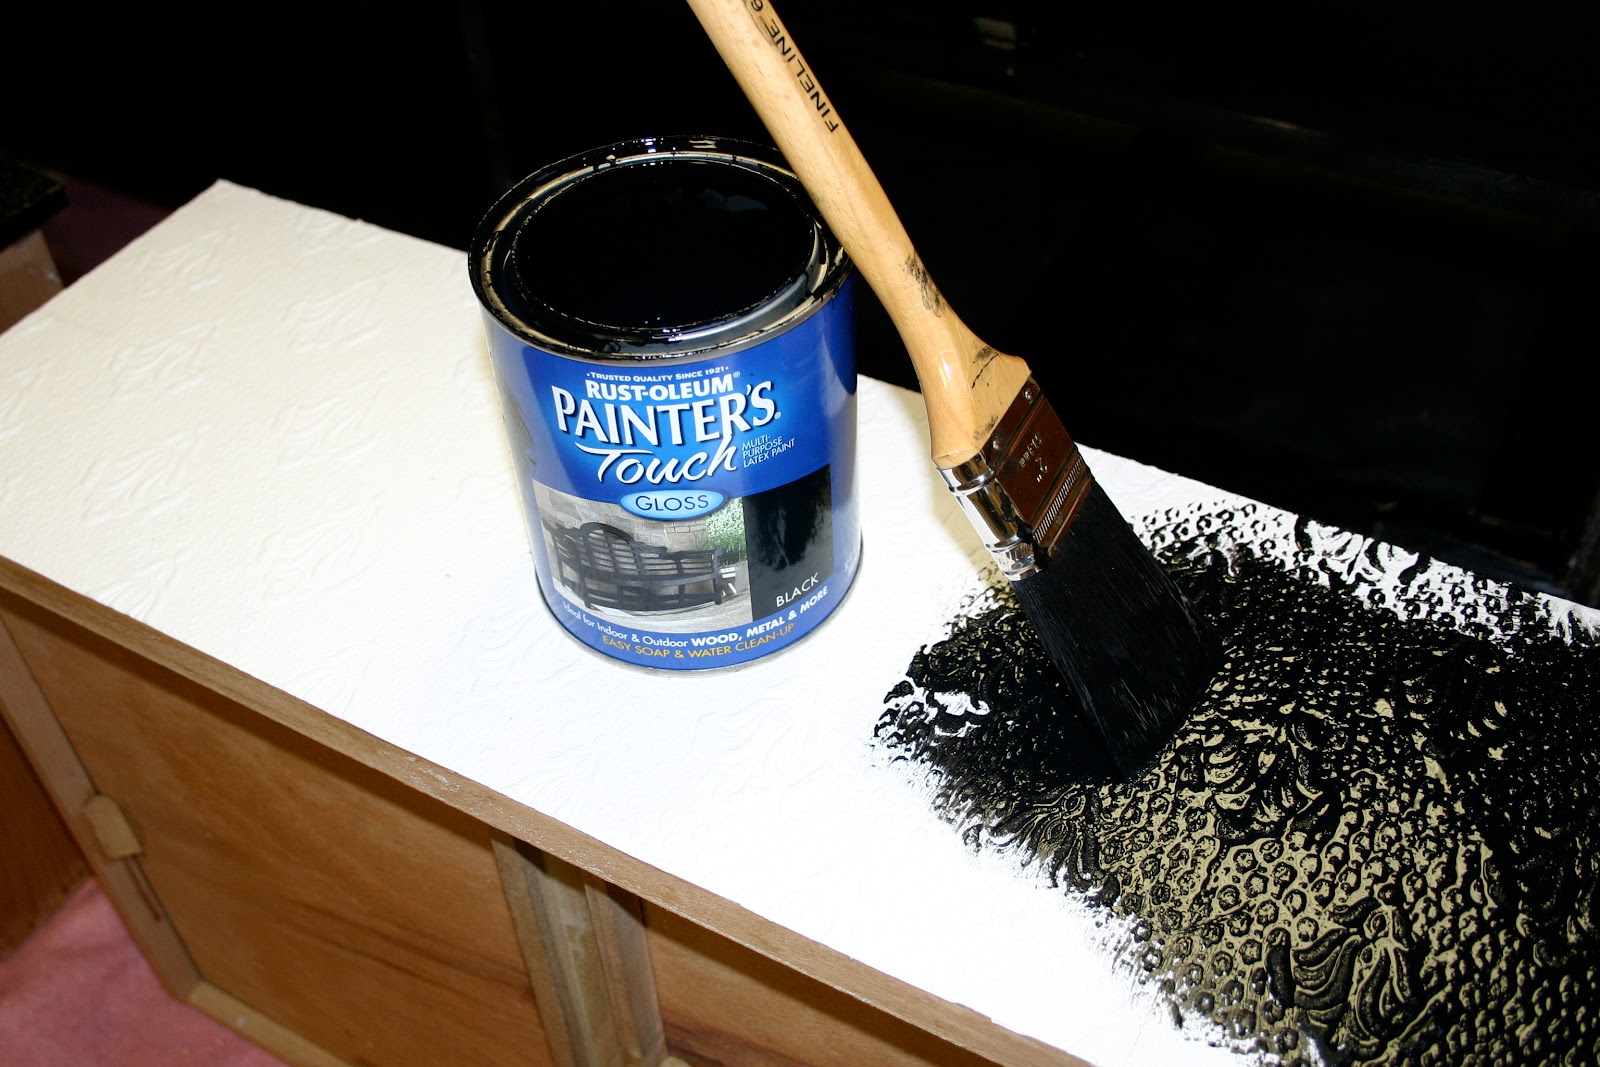
And here is the really crazy idea that I had for the top. The top was a veneer, so it had a really nice grain. And part of me hates to paint nice wood, even if it is just veneer. So I decided to leave the best part of the grain...and paint the rest black. Yes, crazy. I don't even know if I love it or not, but I'm glad I did it. There's something freeing about doing something a little hair-brained and not caring. And again, "Hey, $10 Dresser."
This is what I did:

Here is a shot of the top after the poly:


And here it is, all done!

"Hey, $10 Dresser."
Got any crazy schemes of your own?

I also like to be crazy sometimes, and try new things. But sometimes I'm scared to wreck my project, so I stick to rigid ideas. Maybe I need to find myself a ten dollar item and just play with it. I really like the top, but I like asymmetrical designs.
ReplyDeleteTotally love the peek-a-boo grain and the fact that you kept the hardware. I'm a sucker for hardware.
ReplyDeleteKim@reposhture.blogspot.com