
Here she is. My first dining table project, with chairs to boot!

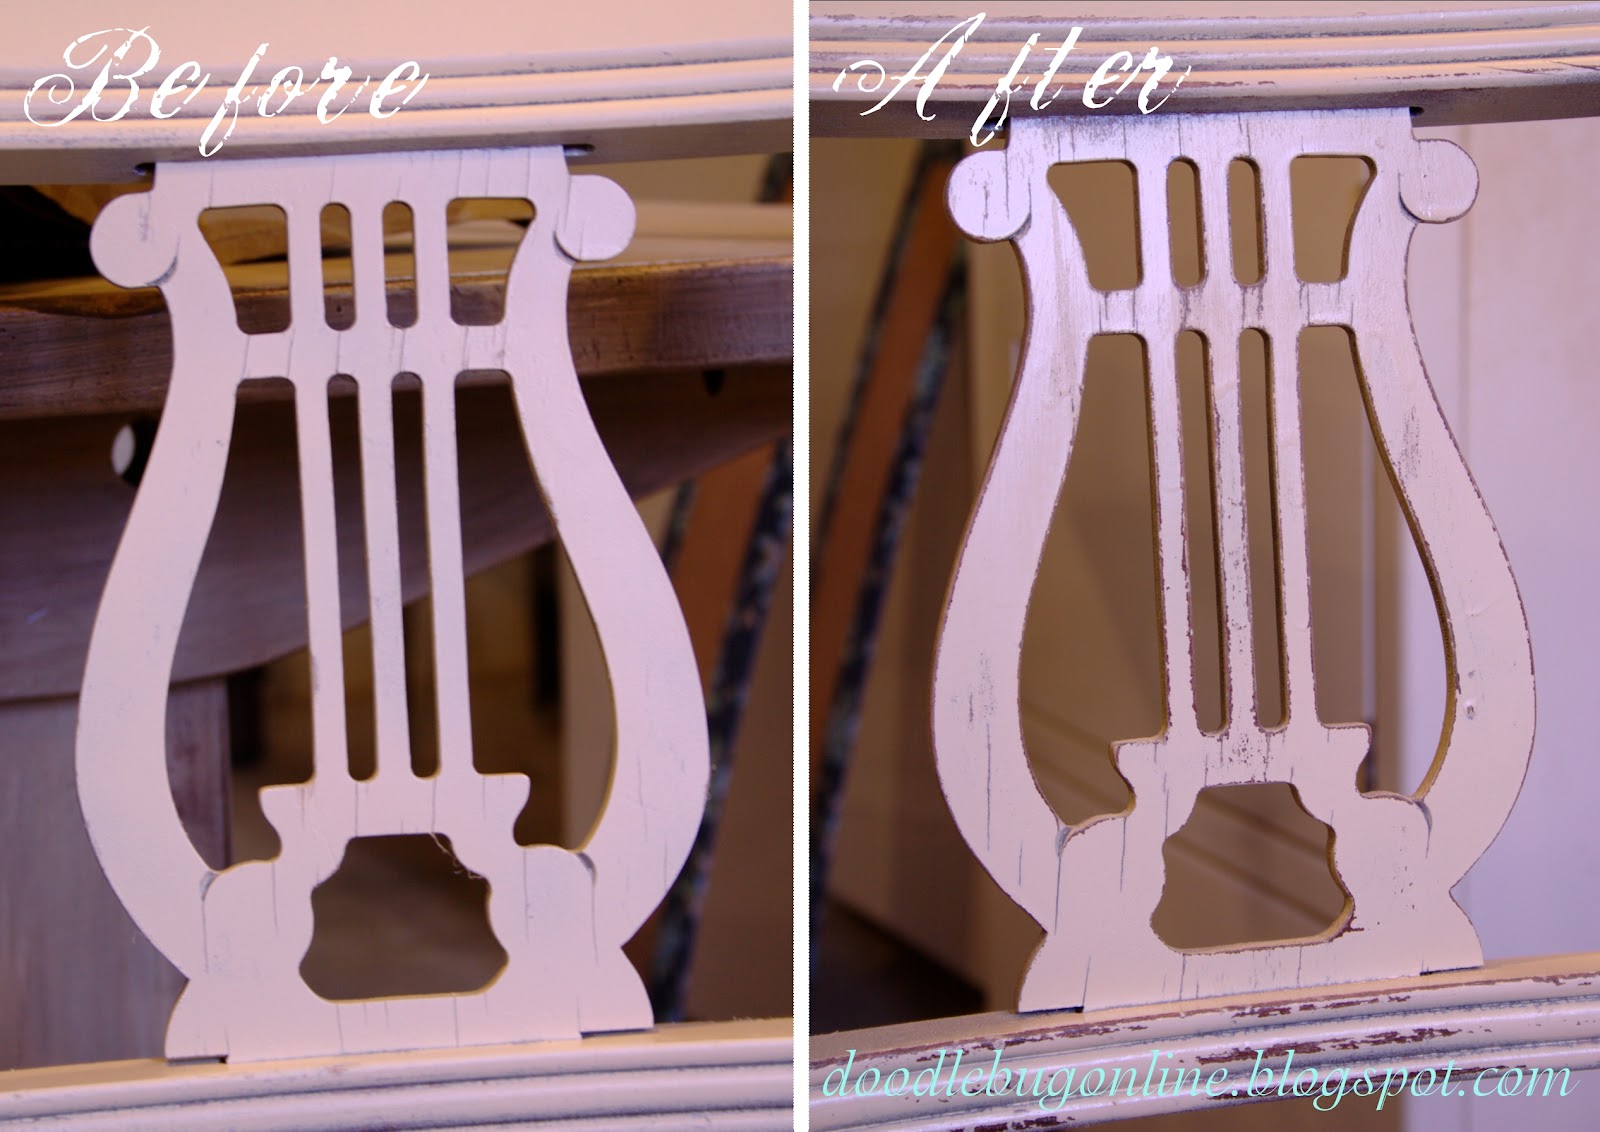
I picked up this table and four chairs from a lady trying to get rid of some things in her garage. She'd had them for a long time and just didn't want it all around anymore. I snapped that deal right up! Of course, I'm terrible at taking "Before" pictures, so I don't have a before picture of the table. But I have one in primer stage, so I'll leave the original very "orangy-pine" look to your imagination. I do, though, have before pictures of the chairs, so we'll start there!


After they were sanded down, I grabbed my trusty Rust-Oleum spray paint. This time I used Ivory Silk in a satin finish. When I'm distressing pieces, I try to stick to satin finishes. Glossy finishes just don't mesh with aged pieces in my mind.
So once the chairs were all painted white, (After opening the basement door in the cold and hoping all the fumes would go out and not into the house--though today I set up a fan to grab the air and swoosh the fumes out, it worked really well), I grabbed my sandpaper and distressed the edges. Just think about where the paint would naturally scuff off, and sand away!
Here are the chairs, with brand spankin' new fabric! For a simple chair upholstery how-to, check out the Reupholstered Dining Chairs + Cording post, or the Baby Piano Bench post.
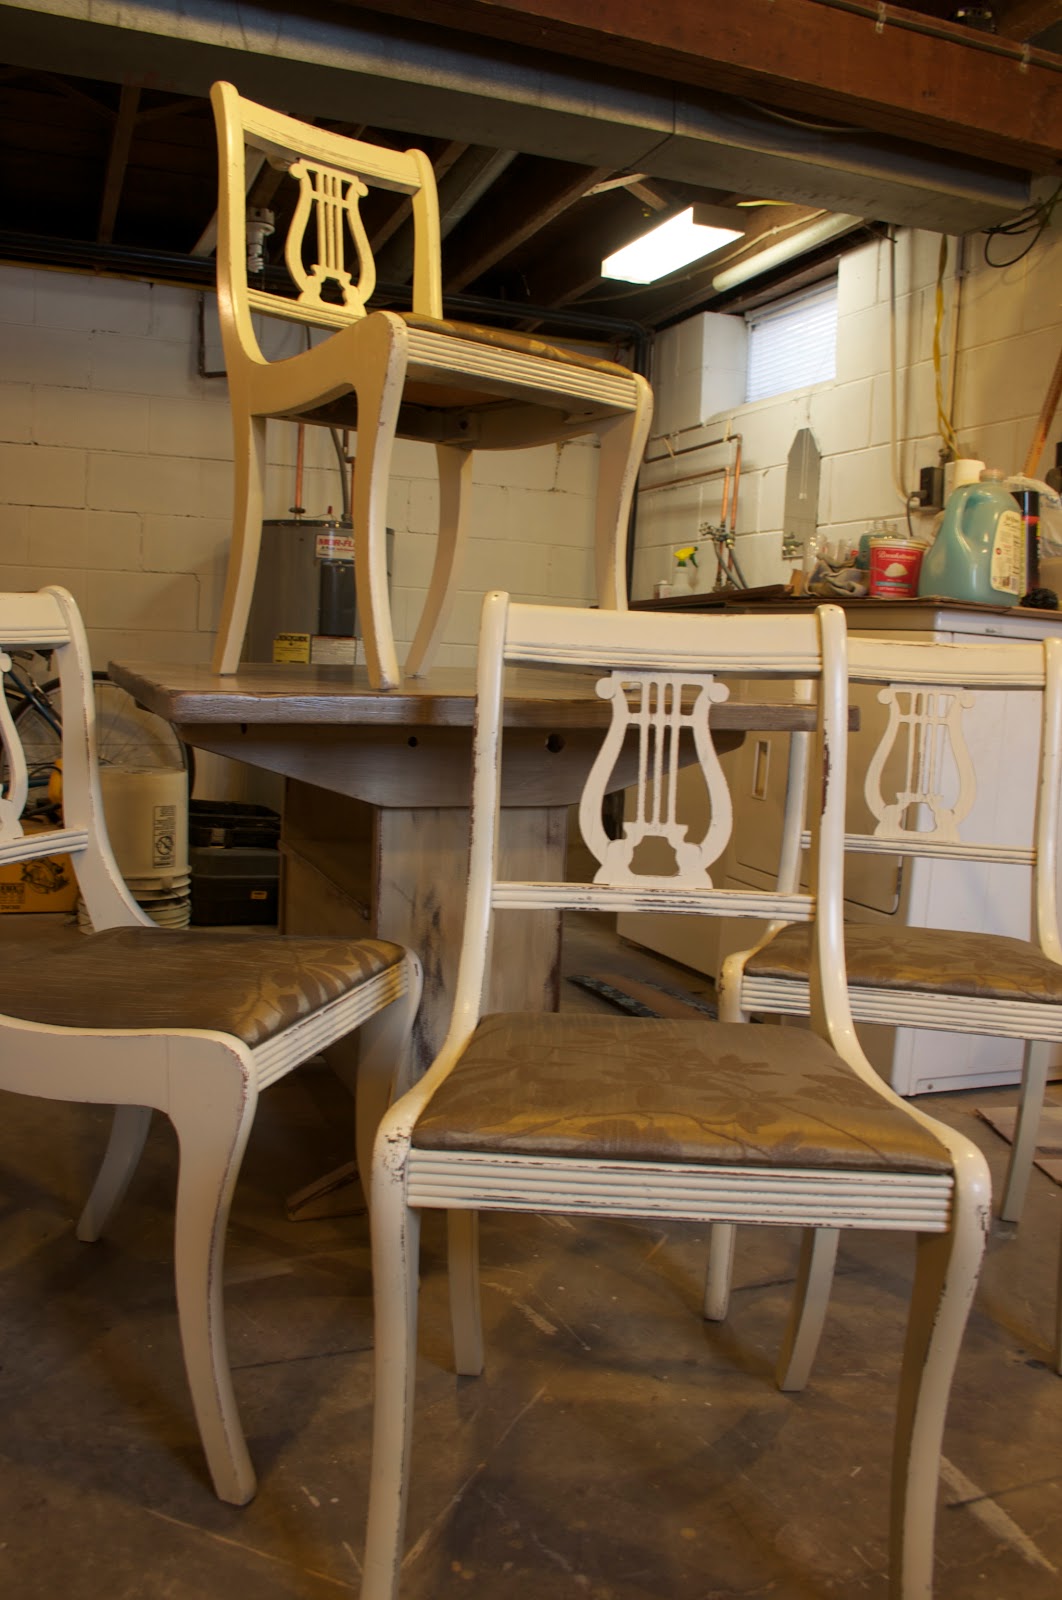
With the chairs down, let's head on over to the table. This table is a strange little beast. It is a flip-top table, which means that it has pegs attaching the top to the base, and when you want, the top will "flip" up and reveal a little bench space underneath. I'll show you pictures at the end :)
Here are my paint products for this project:
Zinsser FastPrime 2, tinted with craft paints to make it a warm off-white.
Dark brown watered down paint (watered down until it's like skim milk)
Minwax Polycrylic
Also, paper towels & gloves

One of my goals for this project was to get the same distressed look of oil-based stain, like on the Distressed Antique Dresser, but I wanted to do it with all water-based products. And I did. Yesss! I love the fume-free me! So here's how to get a fume-free you.
First, prime/base coat the table with the tinted primer, painting with the grain in long even strokes. Don't worry about getting thick, solid coverage. We're going to distress it, so a little unevenness is a good thing.


Next, (and here's the fun part) take that watery brown paint, put on your gloves and grab some paper towels (you could also use regular rags...if you're being environmentally conscious, which I am apparently not, judging by the truck I drive).
Dip a wad of paper towels in the paint and, working in long sections, wipe it onto the tabletop. Very quickly, grab a dry wad of paper towels and wipe off the brown paint, (starting at the edges, since if they dry you'll get a weird set of lines between sections), in long, even strokes. Try to wipe the full length of the table in one shot, so it looks like it's very continuous. Wipe, wipe, wipe, until you're happy with it--if you wipe off too much, you can always go back and add some more later, just wipe gently since there's not much binder in the paint to keep it stuck to the table. Then grab your soaked paper towels and do the next section! Make sure to get plenty of paint in the raw areas that you sanded, especially on the edges.


Once that's done and dry, it's pretty much done! All that's left to do is put on some Polycrylic. I put a single layer on the base and underside of the tabletop, and two good thick coats on the top. Ooh, so pretty with a little satin shimmer!

Remember how the table tips up? I know you've been biting your nails wondering "How in the world does it happen?" I know you, you curious cats. Since you've been waiting so long, here are some pictures.


Ooh look, a bench!

Holy storage, Batman! Maybe a great place to put tablecloths, since I don't use them all the time...
Well there you have it. I can now check off "Redo a Table & Chairs" on my bucket list. Okay so that's not really on my bucket list, but I liked doing it anyway. For those of you who just like to see the pretty picture, here it is again (I know you're out there, you picture skimmers ;) )


So you get jealous of don't worry about me, I'm warning you ahead of time that I won't be posting for a little while because Joe and I are going with his family on a cruise. Yes, leaving the serenity of Minnesota in March and our sloppy driveway for the Caribbean will be a sacrifice, but I will do it...for family. Sigh.
*SMACK* I know, that's what you want to do to me. Well, if you need a little something to cheer you up, here's a little memento from about a month and a half ago.

But don't worry, I hear it's supposed to be in the 50's around here next week :)
Truly, all joking and prodding aside, we're excited. So until next time, paint something and send me pictures!!
I'm linking up to:
French Country Cottage
Miss Mustard Seed
The Shabby Nest
Chic on a Shoestring Decorating
Simple Home Life
My Romantic Home
2805
At the Picket Fence
Common Ground
The Charm of Home
Redoux

Great technique and tutorial! I hope you are cool with me pinning this. ~ Maureen
ReplyDeleteawesome! I actually just finished a lyre back chair last weekend! Here's a link to a pic of it on pinterest: http://pinterest.com/pin/245938829621049461/
ReplyDeletewow! What a great job. Love it!
ReplyDeleteI love the chairs... they turned out beautiful! It looks like all your hard work paid off. I just finished painting our dining table. So I understand all the hard work you put into it.
ReplyDeletehttp://www.colortransformedfamily.com/2012/03/14/instant-family-heirloom/
Fabulous look! I love your blog!! New follower :)
ReplyDeleteLooks fantastic. Methods are easy too.
ReplyDeletelooks fabulous, I had done the same thing with my wishbone chair, just followed this guide
ReplyDeleteWhat an amazing job you did, it's just beautiful!
ReplyDeleteGlass Table And 4 Chairs
Kitchen Tables On Sale
Best Furniture Stores In Denver
DIY Smart Saw and DIY Magic Machine
ReplyDeleteDOWNLOAD eBook https://tinyurl.com/diymagicmachine2018
I found your this post while searching for information about blog-related research ... It's a good post .. keep posting and updating information. Best Flip Chairs in 2018
ReplyDeleteHaving this link in mind, Payoneer Sign UP will earn you free bonus.
ReplyDeletebest flip chairs
ReplyDelete