
We have some local friends who have been cleaning out some buildings on their farm. Whenever they find random old things that they think I might like, they put them aside for me.
Because. They're. So. Darn. Sweet.
We'll call them Family H.

When Joe came home from visiting Family H a couple of weeks ago with this bench from their barn, even I thought it was in rough shape--and that's saying something!

Well, as soon as I got the time I decided it was time to attack it and see what I could do. I didn't really know where it would end up but after I swept out all the cobwebs, I grabbed my paint scraper and got started.
POP QUIZ: When scraping or sanding old paint off of things, what safety concern should be addressed?
If you answered Lead Paint, you get a gold star for the day! Because I had no idea what kind of paint was used to paint this bench, I grabbed my handy-dandy respirator.

You can also use one of those disposable white masks with the HEPA filter on the front--just make sure it's a particulate respirator. BUT when you use the white ones, you miss out on the chance to look like THIS!!

Seriously, you can look as good as that for a mere $40! Oh, and it keeps spray paint fumes and lead paint dust among other things out of your lungs. I guess that part is good, too.
After I scraped off the really loose parts, I sanded it using my orbital sander to rough up the remaining paint, and then gave the bench a coat of Zinsser Peel Stop, a product that I discovered which seals up peeling paint or other unstable surfaces and gives you a good solid surface to paint.


While the Peel Stop was drying, I mixed up my paint.

I decided while I was prepping the bench that I wanted to paint the back and seat, and leave the legs as-is. I had been talking to a friend who was thinking about painting her little girl's room with stripes...so I decided to go with stripes.
As for colors, I am currently loving mid-tone grey. It's a simple, calming color that goes with pretty much anything. And for some reason a dark midnight blue was calling my name. Since I had a mid-tone and a dark, I needed a light color. White was my natural choice.
How to Paint Clean, Crisp Stripes
Doesn't it make you crazy when you tape out stripes, get them all painted, and when you pull off the tape the paint has bled underneath and given you a jagged edge??? Well, there is a simple way to fix that, which I first learned from a very smart Set Designer a few years ago. Get ready, you'll be painting stripes like a pro in no time.
Step 1: Paint your entire project one of your chosen colors.
I painted the seat and back grey, since it can be covered easily by the white and blue.
When in doubt, choose the middle color.
Step 2: Lay out painter's tape however you want to paint the next color.
Since I wanted the stripes on the back to be vertical and wrap all the way around, I used
a square to make sure it was perfectly vertical.
 Step 3: Burnish the tape.
To burnish, simply run your finger along the edge of the tape and give it a good amount
of pressure. This seems like a no-brainer, but it is critical to getting a good seal.

When in doubt, choose the middle color.
Step 2: Lay out painter's tape however you want to paint the next color.
Since I wanted the stripes on the back to be vertical and wrap all the way around, I used
a square to make sure it was perfectly vertical.

To burnish, simply run your finger along the edge of the tape and give it a good amount
of pressure. This seems like a no-brainer, but it is critical to getting a good seal.

Step 4: Using a smaller brush, paint over the edges of the tape that are to be painted with the color that you already painted.
This seals off the edge of the tape, and any bleeding through that happens will be invisible!

Note: When painting only a portion of a piece, make sure to brush out the edges to avoid a "Dry Line." See more on that below :)
Step 5: Paint your second stripe color.
Make sure your paint from step 4 is completely dry, and paint away!
Step 6: Peel off tape and jump up and down with excitement because you painted a perfect stripe!!


If you are only doing two colors, then you're done! But I wanted to throw in some white and liven up the mix. The grey and blue just weren't popping out like I wanted. However, there was no good way to pre-paint my tape edges because the edge was right on a previous edge between grey and blue. SO I had to use Plan B.
Painting Crisp Stripes: Plan B
Follow Steps 1-3 from above.
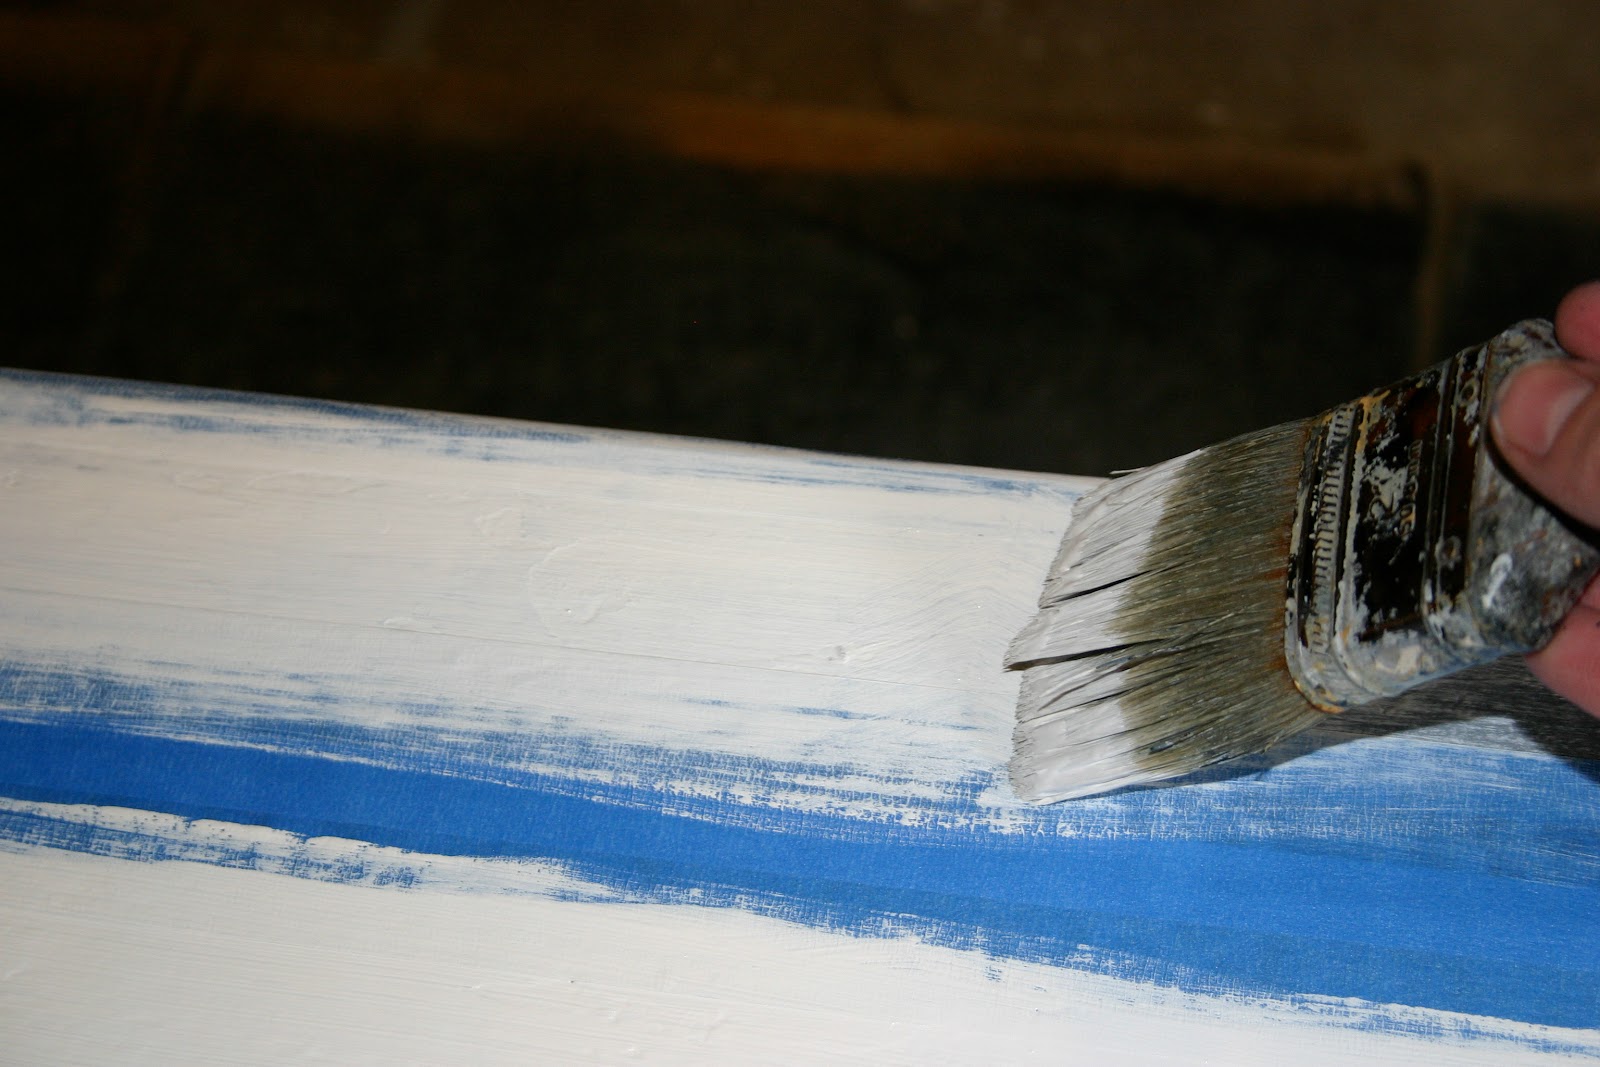
Step 4: Paint a very very light coat of your second (or in this case third) stripe color between the tape.
The key to avoid bleeding is to use thick paint (don't water it down) and to use almost no
pressure. Just let the weight of the brush place the paint for you.
Step 5: let the paint from step 4 dry, and then paint a good solid second coat.
Step 6: Pull off the tape and call your mom because you just painted a perfect stripe!
Now, Plan A is much more foolproof, but in a pinch Plan B should get you there.

HOW TO FIX A NICK
When working with tape, especially when working quickly, sometimes it will peel a small section of paint off. In order to fix that without creating a strange, uneven surface, is pretty simple. This also applies when you're painting step 4 from Plan A, and when trimming out walls or furniture.

using a small brush, paint over the area, but don't leave the paint piled up. Whisk your brush over the area, drawing out the paint until it naturally runs out on your brush. Brush until your painted area has no more defined edge (called a "Dry Line").

See? No defined edge...and no more nick! Crisis Averted.
Once the piece was all prettied up, I sealed it with Minwax Polycrylic. I'm not risking damage to those stripes after all that work!!
And now that you've learned more than you ever thought you needed to know about painting stripes, here is the reveal:
BEFORE:
AFTER:


Ooh, I am lovin' those stripes, and so glad I left the oak legs intact. Pretty, pretty, pretty. And it gives the piece some age, which I'm excited about.
NOW GO PAINT SOME STRIPES THAT WILL MAKE YOUR MAMA PROUD!!!


kinda reminds me of a beach chair. PS-I did not get a call about perfect stripes.
ReplyDeletetotally thought that was fabric! Great painted stripes!!! :)
ReplyDeleteOoh, fabric is a good idea too...
DeleteMom--sorry I didn't call...but I just got off the phone with you, so I think that counts :)
This comment has been removed by a blog administrator.
ReplyDeleteThis comment has been removed by a blog administrator.
ReplyDeleteThank you for sharing this interesting and informative article, painting with airless spray gun will be faster and more interesting!
ReplyDeleteregards,
Airless Spray
y1i54x6e71 m2x39r7z80 m7x58f2z68 g8y05z4t10 p9k32l8q68 r8v64p5q51
ReplyDelete