It's getting cold here. I keep hoping that Summer wouldn't be over, but I have to start embracing Fall. We've had to turn our heat on a few times already. *sigh* But there are some trees getting ready to turn, so I'm sure it's going to be beautiful, even if it is cold. Think positive. And I keep hearing wild turkeys gobble and pheasants cluck, or whatever it is they do. They're funny sounding little things.
But on to the medicine cabinet. I found this medicine cabinet at a sale, and picked it up for a makeover. It was in good shape, but was pretty darn old. Funny enough, I found it the same day I got the Antique Ironing Board Cupboard that I posted on earlier. Things seem to come in waves--I can be looking for cupboards and there are none to be had. Then one day I will find three all at once! Ironic.
So here is the big guy before he got some well-deserved paint:
I got the first set of pictures a Little late--so I already had the mirror in the middle taped off. You get the picture, though. I just get so darn excited!
Here's the inside...
Again, this sucker is old and heavy.
Translation: It will survive pretty much anything.
It would love to give someone some storage on a wall somewhere, or it could be installed into a wall, like it was originally. Little cupboards can do pretty much anything.
Supercupboards.
Okay, step number one: take it apart. The front door was hinged on, so I just took out the screws to get the door off. Also, the back had hinges as well (maybe it was installed into a wall and they wanted to be able to get to the cupboard from both sides?) so getting out those hinges and taking the back off was a cinch. In the end, I just screwed the back on--the double-hinge setup was frightening me when I moved it.
Color Palette? I am still so much in love with the palette that I used for the Hand-Painted Old Window project, that I just used it again! Thank you once more, Dutch Boy.
So first, I used a watered-down wash of the apple green color, and painted it around the inset around the front door.
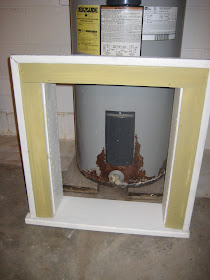
Cute, Cute, Cute. (the cupboard, of course...ignore the water heater, please...)
Now, I needed to problem solve. I had the panel on the back side of the door--(which had been covered up by a naughty metal poster thingy...I still don't know what to do with that thing!)--and I needed to cover it, because it was icky looking. Also, I had the back panel of the cabinet itself, which I wanted to spruce up. I love it when shelves are backed with another color or texture.
Anyway, I have a lot of burlap around...I love that stuff...and I decided to treat it like wallpaper and paste it onto the panels. I used a wallpaper paste that I had leftover from the Glossy Black Dresser, and it worked pretty darn well! I just brushed a solid coat onto the panel, cut a piece of burlap to a rough size, smoothed the burlap onto the pasted panel, and then trimmed the burlap with a utility knife. Phew! No more seductive women on a naughty poster.
The wet lines in the picture did go away--I took the picture while the wallpaper paste was still drying...impatient I am. Also, notice the pallet wood scraps that I cut down for shelves! Yippee!
And for the front, you saw the tape and newspaper on the mirror:
I spray painted that small border with red spray paint, and then used my fancy new sponges to stamp a decorative little square in each corner.
Sorry about the glare...funny how taking pictures of windows and mirrors produces that...
I even spray painted the little screw head for the handle to match the red border. No one will probably ever notice that, but it makes my neurotic creative impulses happy.
Here's the pretty baby in the store!
Awww...it's so happy to feel pretty again. It told me.
So if you need a little glassware, spice, medicine, or even jewelry (put some hooks on the backside of the door for necklaces) storage, keep your eyes open for a little old cupboard and go for it!


No comments:
Post a Comment
I love to read your comments and questions!